


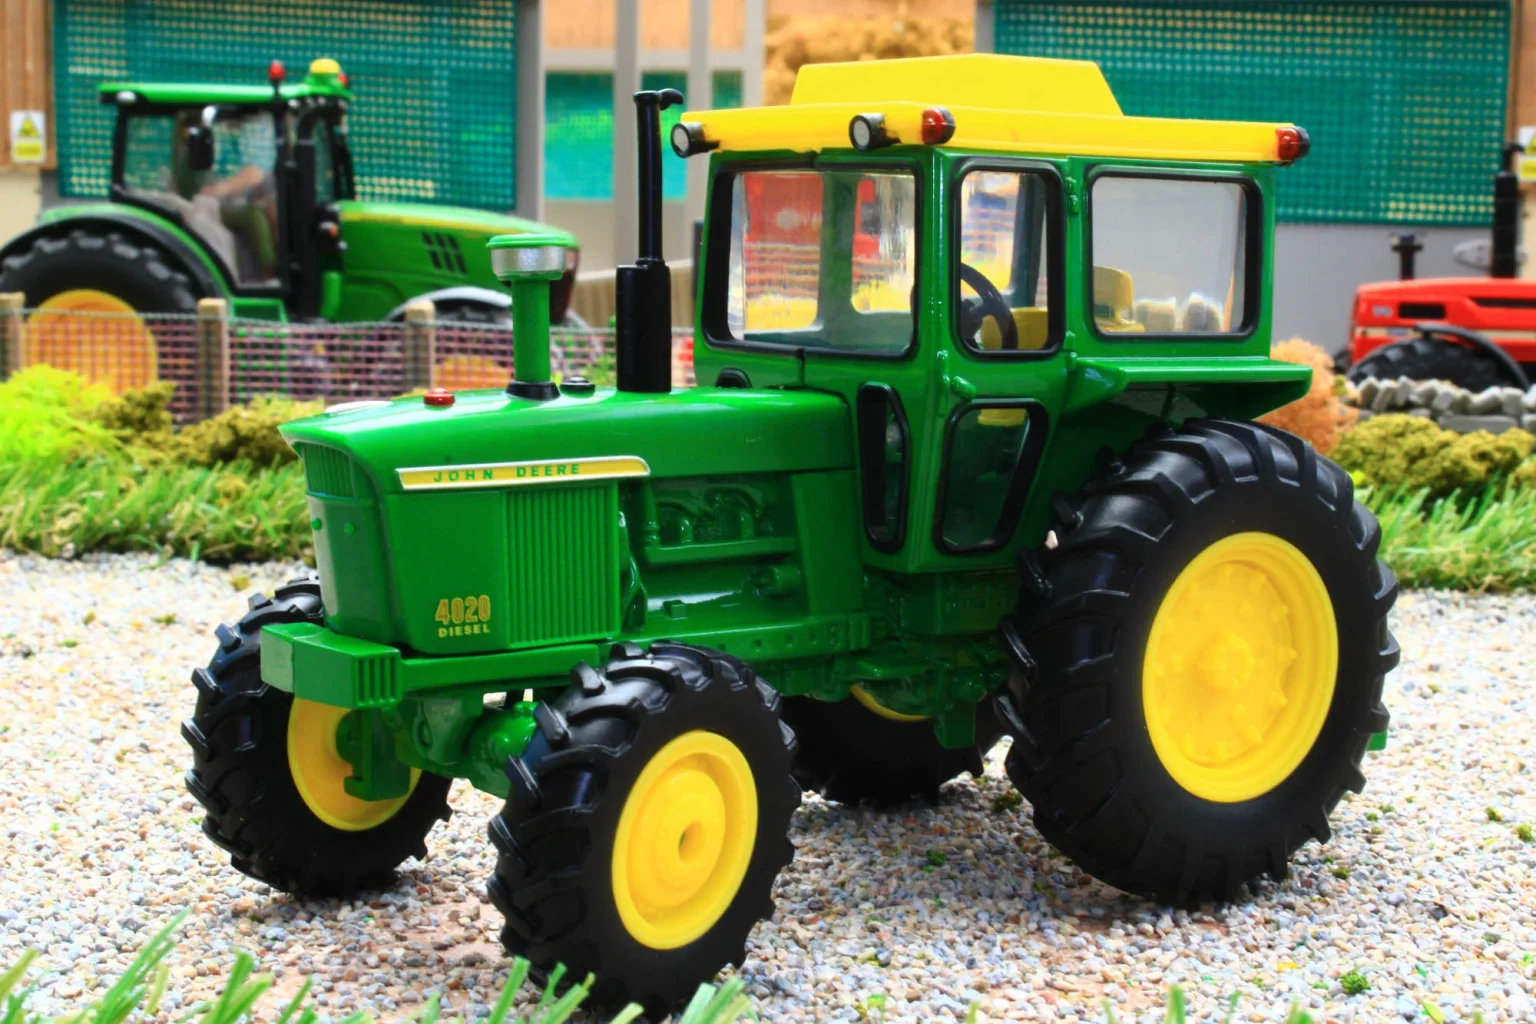
This John Deere 4020 FAQ guide answers the most common questions owners, buyers, and enthusiasts have about one of the most iconic tractors ever built.
- General Information & History
- Engine Specifications & Performance
- Starting & Electrical System
- Hydraulic System & Common Issues
- Transmission (Syncro Range vs Power Shift)
- 3-Point Hitch & Implements
- Common Problems & Troubleshooting
- Buying Guide – What to Look For
- Maintenance & Service
- Parts Availability & Restoration
From history and engine specifications to hydraulics, transmissions, common problems, maintenance, and restoration, this page is designed as a practical reference you can rely on.
If you do not find the exact answer you are looking for, feel free to leave a comment below and ask your question—additional answers will be added as needed.
General Information & History
Covers the production history, model variations, serial numbers, and legacy of the John Deere 4020, explaining why it became one of the most respected and collectible tractors in agricultural history.
How many John Deere 4020 tractors were manufactured in total?
John Deere manufactured a total of 184,879 units of the 4020 tractor at factories located in Waterloo, Iowa and Mexico. The production breakdown by fuel type shows 168,311 diesel models, 8,445 LP gas units, and 8,123 gasoline versions, with diesel accounting for approximately 91% of total production.
This impressive figure makes the 4020 one of John Deere's most successful tractor models ever produced.
What makes the John Deere 4020 so popular among collectors and farmers?
The 4020 combines exceptional reliability, simple mechanical design, and remarkable versatility that appeals to both working farmers and collectors. Its straightforward construction makes it easily repairable with basic tools, unlike modern electronics-heavy tractors.
The tractor's proven durability, powerful performance across diverse tasks, and strong parts availability ensure it remains practical decades after production. Additionally, its historical significance as an agricultural icon and consistent value retention make it highly desirable in both working and collectible markets.
What row-crop tractor did the 4020 replace in John Deere's lineup?
The John Deere 4020 directly replaced the 4010 model in 1964. The 4010 had a relatively short production run from 1960 to 1963, serving as John Deere's first numbered series tractor. The 4020 improved upon the 4010 with increased horsepower, refined hydraulics, better transmission options, and enhanced operator comfort.
This transition represented a significant evolution in John Deere's New Generation of Power series, establishing the foundation for decades of future four-digit model designs.
What were the major differences between early and late model 4020s?
Early 4020s (1964-1965) featured a flat-top fender design and standard dashboard layout, while late models (1969-1972) introduced rolled fenders and optional side console configuration. Significant changes included improved hydraulic systems with increased flow rates, updated transmission components for better reliability, and enhanced electrical systems.
Late models also received stronger rear axles, improved seals to reduce oil leaks, redesigned steering components, and various minor refinements based on field feedback. The side console option, introduced around 1969, became highly desirable for its improved ergonomics and operator comfort.
Was the John Deere 4020 available in different configurations?
Yes, the 4020 was offered in multiple configurations to suit various farming needs. It came in standard, row-crop, high-crop, and orchard versions with different wheel spacings and ground clearances. Fuel options included diesel, gasoline, and LP gas engines. Transmission choices featured either Syncro Range (8-speed manual) or Power Shift (8-speed partial power shift).
Additional variations included single or dual hydraulic systems, standard or deluxe operator stations, and later the optional side console layout. This flexibility allowed farmers to customize the tractor for their specific agricultural applications.
What is the significance of the serial number on a 4020?
The serial number identifies the production year, manufacturing location, fuel type, and specific build sequence of your 4020. Serial numbers are stamped on the right side of the tractor frame near the clutch housing. They reveal whether the tractor was built in Waterloo, Iowa or Mexico, and help determine original specifications and parts compatibility.
Serial numbers are essential for ordering correct replacement parts, verifying authenticity during purchase, dating the tractor for registration purposes, and identifying factory-installed options. Early versus late serial numbers also indicate important engineering changes implemented throughout production.
How does the 4020 compare to the 4010 model?
The 4020 offered significant improvements over the 4010, including increased horsepower from 80 to 91 PTO horsepower in diesel models. It featured a more robust transmission with better gear ratios, enhanced hydraulic capacity with improved flow rates, and superior operator comfort with better seating and controls.
The 4020 addressed many reliability issues found in early 4010s, including strengthened final drives, improved seals, and better cooling systems. Additionally, the 4020 introduced the optional Power Shift transmission and ran for eight years versus the 4010's three-year production span, proving its superior design.
What awards or recognition did the 4020 receive during its production?
The John Deere 4020 received recognition as one of the most influential agricultural machines of the 20th century. While specific formal awards during its production era are not well-documented, the tractor earned widespread industry acclaim for engineering excellence and innovation. Its greatest recognition came posthumously through its induction into the Smithsonian Institution's collections and designation as an agricultural icon.
The JD 4020 consistently ranks among the top ten most important tractors ever built in industry polls and publications. Its lasting legacy and continued reverence among farmers serve as testament to its groundbreaking impact on modern agriculture.
Why is the 4020 considered one of John Deere's most iconic tractors?
The 4020 represents the perfect convergence of power, reliability, and timing in agricultural history. It arrived when farms were rapidly modernizing and mechanizing, offering the ideal horsepower range for medium to large operations. Its exceptional build quality meant tractors lasted decades with proper maintenance, creating a legendary reputation for durability.
The model's eight-year production run allowed John Deere to refine and perfect the design, while producing nearly 185,000 units ensured widespread adoption. Its simple yet effective engineering, strong nostalgic appeal, and proven track record cemented its status as the benchmark against which all subsequent utility tractors are measured.
Engine Specifications & Performance
Details engine options, horsepower, fuel systems, RPM ranges, and real-world performance differences between diesel, gas, and LP versions of the John Deere 4020.
What is the horsepower rating of a John Deere 4020?
The horsepower rating varies by fuel type and measurement method. The diesel version, being the most powerful, produces 91 PTO horsepower and 84 drawbar horsepower at 2,200 RPM during official Nebraska tests.
Gasoline and LP gas models deliver slightly different power outputs, with gasoline engines rated around 88-90 PTO horsepower depending on the engine version. All versions provided sufficient power for medium to large farming operations, handling implements like five-bottom plows, large discs, and hay equipment with ease.
What is the PTO horsepower of the 4020 diesel model?
The diesel 4020 produces 91 PTO horsepower at 2,200 RPM according to Nebraska Tractor Test Lab results. This power output made it ideal for demanding PTO-driven implements including large balers, forage harvesters, rotary mowers, and grain augers.
The engine also generates approximately 278 lb-ft of torque at 1,600 RPM, providing excellent lugging ability under heavy loads. This combination of horsepower and torque allows the 4020 diesel to maintain consistent performance across various field conditions without frequent downshifting.
How much fuel does a John Deere 4020 consume per hour?
Diesel models with Syncro Range transmission average 5-6.4 gallons per hour under normal working loads, while Power Shift versions consume approximately 6.5 gallons per hour. Fuel consumption increases with heavier implements and challenging field conditions.
Gasoline models are significantly thirstier, burning approximately 7 gallons per hour under full load conditions during fieldwork. LP gas versions fall between diesel and gasoline in consumption rates. The diesel's superior fuel efficiency and ability to work one gear faster than gas models make it the most economical choice for extended operation.
What is the engine displacement of the 4020 diesel engine?
The diesel engine has a displacement of 404 cubic inches or 6.6 liters. This six-cylinder engine features a bore of 4.25 inches and a stroke of 4.76 inches, with a compression ratio of 16.5:1 for optimal diesel combustion efficiency.
The substantial displacement provides excellent torque characteristics throughout the RPM range, making it well-suited for heavy draft work and sustained PTO operations. This engine design proved extremely durable, with many 4020 diesels still operating today with minimal internal wear after thousands of hours of service.
Can you turbocharge a John Deere 4020 engine?
Yes, the 4020 can be turbocharged using aftermarket kits, most commonly the M&W turbo kit which was a popular modification. These kits typically include a Rajay turbocharger, custom exhaust manifold, oil supply lines, and all necessary mounting hardware to safely boost engine power.
Installing a turbocharger can increase horsepower by 20-30% when properly tuned with appropriate fuel injection pump adjustments and upgraded injectors. However, turbocharging requires careful installation, regular maintenance, and may reduce engine longevity if not done correctly with proper supporting modifications.
What is the compression ratio of the JD 4020 diesel engine?
The diesel engine features a compression ratio of 16.5:1, which is typical for naturally aspirated diesel engines of that era. This high compression ratio enables efficient diesel combustion, providing excellent fuel economy and strong low-end torque characteristics.
Gasoline models use much lower compression ratios of 7.5:1, while LP gas versions operate at 9.0:1 compression. These lower ratios accommodate the different ignition characteristics and octane requirements of spark-ignited fuel systems versus compression-ignition diesel operation.
How does the gas version compare to the diesel in terms of power?
Gasoline models produce slightly less power than diesel, rated around 88-90 PTO horsepower compared to the diesel's 91 PTO horsepower. However, the real difference lies in fuel consumption, with gasoline models burning approximately 7 gallons per hour versus the diesel's 5-6 gallons.
The diesel engine provides superior torque at lower RPMs, making it better for heavy draft work and sustained loads. Gasoline models offer quicker throttle response and smoother operation at higher speeds, but lack the lugging power and fuel efficiency that made the diesel version far more popular with farmers.
What RPM does the 4020 engine run at for maximum power?
The 4020 engine develops maximum rated power at 2,200 RPM, which is the standard PTO speed for agricultural equipment of this era. At this engine speed, the diesel produces its full 91 PTO horsepower and optimal power delivery for field operations.
Peak torque occurs at a lower 1,600 RPM, providing excellent pulling power during heavy draft work. The engine's idle range spans 600-2,500 RPM, allowing operators to adjust engine speed for various implements and working conditions while maintaining efficient operation across the power band.
What type of fuel injection system does the 4020 diesel use?
The 4020 diesel uses a Roosa Master mechanical fuel injection pump, which is a distributor-type injection system. This pump delivers precisely metered fuel to each cylinder through individual injection lines and multi-hole injector nozzles at high pressure for efficient combustion.
The mechanical system requires no electrical components for fuel delivery, making it extremely reliable and field-serviceable. Regular maintenance includes proper fuel filtration, periodic injector testing, and occasional pump calibration to maintain optimal fuel delivery, power output, and fuel economy throughout the engine's service life.
Starting & Electrical System
Explains the unique 24-volt starting system, battery configuration, common no-start issues, conversions, and electrical troubleshooting tips specific to the 4020.
How do I troubleshoot a 4020 that won't start?
Begin by checking battery voltage with both batteries reading at least 12 volts each, then inspect all battery cable connections for corrosion and tightness, particularly ground connections. On 24-volt systems, verify proper battery hookup configuration as incorrect wiring prevents starting.
Check fuel supply by confirming the fuel shutoff valve is open, filters aren't clogged, and diesel models have no air in fuel lines requiring bleeding. Test the starter solenoid by jumping terminals to determine if the starter motor works, inspect neutral safety switch operation, and examine the starter button switch for continuity. On tractors that sat idle, the closed-center hydraulic system may cause hard starting until pressure equalizes, solved by quickly rocking the steering wheel while cranking.
Can I convert my 4020 from 24-volt to 12-volt starting?
Yes, converting to 12-volt is a common and highly recommended modification that simplifies the electrical system significantly. Complete conversion kits are available from suppliers like Steinert Manufacturing, including a modern high-torque 12-volt starter, alternator, wiring harness, and detailed instructions for proper installation.
The conversion eliminates the complex split-voltage system, makes jump-starting easier with any vehicle, improves parts availability, and reduces troubleshooting complexity substantially. Modern 12-volt starters produce more cranking power than original 24-volt units despite lower voltage. Many owners who've converted report better reliability and easier maintenance, making this upgrade particularly worthwhile for working tractors rather than show pieces.
What size batteries does a John Deere 4020 require?
The 24-volt system requires two Group 2 batteries with minimum 550 CCA each, though higher capacity batteries around 650-750 CCA provide better starting performance especially in cold weather. These batteries must be 12-volt units connected in series to create the 24-volt starting circuit.
Later 12-volt models or converted tractors use a single Group 3 or larger agricultural battery rated 750-1000 CCA for optimal performance. Battery quality matters significantly, with genuine John Deere, Interstate, or quality farm batteries typically lasting 4-6 years. Avoid undersized automotive batteries as they lack sufficient reserve capacity for agricultural starting demands and hydraulic system loads.
Why does my 4020 click but not turn over when starting?
A clicking sound indicates the solenoid is engaging but insufficient power reaches the starter motor to crank the engine. Most commonly, this stems from poor connections at battery terminals, corroded cable ends, or inadequate ground strap connections that create excessive resistance in the circuit.
Weak or discharged batteries also cause clicking despite showing adequate voltage on a multimeter, as they cannot deliver sufficient amperage under load.
Clean all battery posts and cable clamps thoroughly with a wire brush, ensure the ground strap has solid metal-to-metal contact at both ends, and load test batteries to verify cranking amperage capacity. On 24-volt systems, incorrect battery hookup or a failing starter motor drawing excessive current can also produce clicking without cranking.
How do I test the starter motor on a 4020?
To bench test a 24-volt starter, connect two 12-volt batteries in series by linking the positive terminal of battery A to the negative terminal of battery B. Using jumper cables, attach the positive post of battery B to the large copper terminal on the starter solenoid, and ground the starter housing to the negative of battery A.
The starter should spin rapidly and the bendix should engage when properly energized. Before testing, inspect for copper brush dust accumulation inside the starter housing, as this conductive debris commonly causes starting problems on 4020s. Clean thoroughly with compressed air if present. On tractor, you can test by bypassing the solenoid with a screwdriver across terminals to determine if the issue is electrical or mechanical.
What causes the batteries to drain quickly on a 4020?
The most common cause is copper brush dust accumulation inside the starter motor housing, creating a parasitic current path to ground that slowly drains batteries over days. This particularly affects the right-hand battery on 24-volt systems. Corroded or moisture-damaged ignition switches also frequently cause phantom drains by maintaining unintended electrical pathways.
Other culprits include faulty voltage regulators with reverse current leakage, alternator diode failures, poor ground connections creating resistance, and aftermarket accessories improperly wired with constant power draw. To diagnose, disconnect the battery cable and use a test light between post and cable end with everything off.
If illuminated, systematically disconnect components until identifying the drain source. Inspect the fuel sender circuit as it sometimes grounds out causing discharge.
Where is the starter relay located on a John Deere 4020?
The starter relay is typically mounted on the right side of the tractor near the batteries and fuel tank area. On some models it's attached to the frame rail or battery box area for easy access during troubleshooting. Late model 4020s may have the relay positioned differently than early models.
The relay has large terminals for heavy current flow and a small trigger wire from the ignition switch. Common relay problems include poor ground connections at the mounting location and corroded terminals preventing proper engagement. Check that power reaches one side of the large terminals when troubleshooting no-start conditions, as broken wires from battery posts are common on this series.
Can I jump-start a John Deere 4020 with a regular vehicle?
You can jump-start a 12-volt converted 4020 normally using any vehicle, connecting positive to positive and negative to ground. However, jump-starting a 24-volt system requires extreme caution and different procedures. Never connect a 12-volt vehicle directly to a 24-volt tractor's starting circuit as this creates dangerous voltage mismatches.
For 24-volt systems, you must jump each 12-volt battery individually using the proper series connections, or use a dedicated 24-volt jump pack designed for heavy equipment. Many owners find the 24-volt jump-starting complexity frustrating, making 12-volt conversion attractive. Always verify your tractor's voltage system before attempting any jump-start to avoid electrical component damage or personal injury from improper connections.
What is the proper battery hookup configuration for the 4020?
For 24-volt systems, connect the positive terminal of the right battery to the negative terminal of the left battery, creating a series connection. The left battery's negative connects to the large solenoid terminal, while both the left battery's positive and right battery's negative connect to frame ground, creating the split voltage system.
For 12-volt converted tractors, connect both batteries in parallel with both positive terminals going to the starter and both negative terminals grounding to the tractor frame. This configuration doubles amperage capacity while maintaining 12 volts. Always ensure clean, tight connections at all terminals and use proper gauge cables rated for high amperage starting loads. Incorrect hookup prevents starting and can damage electrical components severely.
Hydraulic System & Common Issues
Focuses on hydraulic capacity, pump performance, fluid requirements, leaks, pressure problems, and common hydraulic failures affecting the John Deere 4020.
What type of hydraulic fluid does a 4020 use?
John Deere recommends Hy-Gard transmission and hydraulic oil, which meets J20C specifications and contains important brake anti-chatter additives. The original specification called for 303 Special Purpose oil, but Hy-Gard provides superior performance and cold weather characteristics.
Acceptable alternatives include any universal tractor hydraulic fluid meeting J20C or J20D specifications from major manufacturers like Mobil 424, Harvest King, or quality store brands. Avoid using straight 303 oil in working tractors as it lacks modern additives and performs poorly in cold conditions. Always ensure the fluid meets wet brake and clutch compatibility requirements for Power Shift models.
How many gallons of hydraulic fluid does a 4020 hold?
Syncro Range transmission models hold approximately 10 gallons of hydraulic fluid, while Power Shift versions require about 12 gallons due to the more complex transmission system. These capacities include fluid in the transmission, hydraulic system, oil cooler, and reservoir combined.
When changing fluid, expect to drain slightly less than full capacity as some oil remains in passages and components. Check the dipstick located under the right side of the operator's seat for proper level. Running oil levels one gallon low is acceptable for many operators, though maintaining full capacity ensures optimal hydraulic performance and cooling.
What causes hydraulic leaks around the remote cylinder valves?
Remote cylinder valve leaks stem primarily from worn or damaged O-rings and seals inside the valve body that deteriorate over time from heat and contamination. The selective control valves on 4020s are notoriously complex with multiple internal seals that commonly fail, allowing external leakage.
Wear on rocker arm shafts and bushings creates gaps permitting oil escape around control levers.
Overtightened fittings can crush sealing surfaces causing persistent weeps. Rebuilding these valves requires patience and precise adjustment of internal components, leading many owners to install simpler aftermarket spool valves instead. Address leaks promptly as they not only waste oil but reduce available pressure for implements.
How do I adjust the hydraulic pressure on a 4020?
Hydraulic pressure adjustment is made at the relief valve located on the left side of the tractor in front of the radiator. Remove the protective cap and use a wrench to turn the adjusting screw, turning it clockwise into the block to increase pressure or counterclockwise to decrease.
Standard hydraulic pressure should be approximately 2200 PSI, measured with a hydraulic pressure gauge installed at a remote outlet. Make small adjustments of one-quarter turn at a time, testing between adjustments. Never exceed 2500 PSI as excessive pressure damages seals and can destroy Power Shift clutch packs.
Low pressure often indicates pump wear or valve problems rather than incorrect adjustment, so proper diagnosis before adjusting prevents unnecessary changes.
What is the hydraulic pump flow rate on a John Deere 4020?
The main hydraulic pump delivers approximately 18-19 GPM at engine rated speed of 2,200 RPM for standard models. Power Shift models and later production tractors may have slightly higher flow rates, with some replacement pumps rated at 24-29.5 GPM depending on the specific application and serial number.
This flow rate provides adequate hydraulic power for operating the 3-point hitch, selective control valves, power steering, and brakes simultaneously under normal working conditions. The closed-center system design means the pump only delivers oil when hydraulic functions are actively used, improving efficiency and reducing heat generation compared to open-center systems.
Why won't my selective control valves hold pressure?
Selective control valves fail to hold pressure primarily due to worn internal seating surfaces and degraded seals that allow oil to bypass internally back to the sump. The complex valve design uses multiple precision-adjusted components including poppet valves, rocker arms, and springs that wear over time from contamination and normal use.
Internal valve seat damage prevents proper sealing when the valve should be holding a load in place, causing implements to drift or drop. Rebuilding these valves requires special holding tools, dial indicators, and precise adjustment procedures that many technicians find challenging. Due to this complexity and frequent problems, many owners bypass the factory selective control valves entirely and install simpler aftermarket spool valves for better reliability and easier maintenance.
How do I rebuild the hydraulic pump on a 4020?
Rebuilding the hydraulic pump requires removing it from the tractor by disconnecting all hydraulic lines and unbolting it from the engine mounting. Disassemble carefully on a clean workbench, inspecting all components including pistons, cylinder block, valve plate, and drive shaft for wear, scoring, or damage requiring replacement rather than simple seal renewal.
Replace all seals, O-rings, and gaskets with a complete rebuild kit, paying special attention to proper installation orientation and lubrication during assembly. The pump must be properly timed during reassembly and pressure-tested before installation to ensure correct operation. Given the complexity and need for cleanliness during rebuild, many owners opt for factory-rebuilt exchange pumps that come pressure-tested and include a core charge, saving considerable time while ensuring proper operation.
What causes slow hydraulic response time?
Slow hydraulic response stems most commonly from restricted oil flow due to clogged suction screens, dirty hydraulic filters, or low fluid levels starving the pump of adequate supply. Cold, thick hydraulic oil during winter operation significantly reduces flow rates until the system reaches operating temperature and oil viscosity decreases.
Internal pump wear reduces output volume even at correct pressure readings, while air in the system from leaks or overnight drain-back causes spongy, delayed responses. Worn selective control valves with internal leakage divert oil away from implements, and failing transmission pump check valves allow oil to drain from the cooler circuit overnight. Check and replace filters first, then verify oil level and inspect for air leaks before suspecting more expensive pump or valve problems.
Can I add more remote hydraulic outlets to my 4020?
Yes, you can add additional remote outlets by installing aftermarket spool valves that tap into the existing hydraulic system. The most common method involves connecting to the pressure port after the priority valve and routing return lines back to the transmission case through existing fittings or by drilling and tapping the filter cover.
Mount the new valve assembly on the right fender, axle housing, or fabricate a custom bracket for convenient access. Use closed-center valves that match the 4020's system design, ensuring proper pressure ratings of 2200-2500 PSI. Many owners prefer this route over repairing problematic factory selective control valves, as modern spool valves provide more reliable operation, easier maintenance, and better control for front-end loaders or multiple implements requiring simultaneous hydraulic power.
Transmission (Syncro Range vs Power Shift)
Compares Syncro Range and Power Shift transmissions, covering gear counts, operation, common problems, maintenance needs, and which option best suits different working conditions.
Which transmission is better for my needs - Syncro Range or Power Shift?
Choose Syncro Range if you need a simpler, more affordable transmission that's easier and cheaper to repair, particularly suitable for loader work requiring quick forward-reverse shuttling, hobby farming, or situations requiring secure park brake on hills. The mechanical design makes it more owner-serviceable and tolerates neglect better than hydraulic systems.
Select Power Shift for field work requiring frequent gear changes under load, baling operations, or applications where seamless shifting improves productivity and reduces operator fatigue. Power Shift excels at maintaining momentum during varying field conditions and provides superior convenience, though repairs cost significantly more when needed. Both transmissions are highly durable with proper maintenance, making condition more important than transmission type when purchasing.
How many gears does a John Deere 4020 have?
Both transmission types provide eight forward gears and four reverse gears, though the operational differences are significant. Syncro Range achieves this through a two-speed synchronized section combined with a four-speed range selector that must be shifted while stopped, creating the eight forward combinations.
Power Shift delivers the same eight forward and four reverse speeds but allows shifting between any gear on-the-go without clutching through hydraulic actuation. The gear spacing was carefully selected by John Deere engineers to cover all farming operations, with variable engine speed compensating for gaps between ratios when precise ground speed matching is needed for specific implements.
What are common Power Shift transmission problems?
Clutch pack slippage represents the most common issue, caused by worn friction discs, failing O-rings allowing hydraulic pressure loss, or contaminated transmission fluid reducing clutch engagement. Symptoms include delayed engagement, inability to hold load, or complete loss of power in specific gears requiring clutch pack replacement.
Linkage problems frequently cause shifting difficulties, including worn roll pins on valve shafts, binding park brake cables, deteriorated shift quadrant bushings, or misadjusted linkage preventing proper valve engagement. Failed PTO brakes cause grinding noises and prevent PTO disengagement. Pressure testing with a gauge bar quickly identifies whether issues stem from mechanical linkage problems or internal hydraulic failures requiring transmission splitting for repair.
How do I adjust the clutch on a Syncro Range 4020?
Clutch adjustment is accessed through an inspection cover on the bottom of the clutch housing or by removing the transmission access panel. Locate the three adjusting screws on the pressure plate release levers and measure the distance between the release bearing and the three release lever fingers using a feeler gauge.
Proper clearance should be approximately 0.125 inches or as specified in your service manual, adjusted equally across all three points to prevent uneven clutch release causing chatter or incomplete engagement. Turn adjusting screws clockwise to increase clearance if clutch drags or counterclockwise to reduce clearance if slippage occurs.
Check adjustment by operating the clutch pedal through full travel, ensuring smooth engagement without grabbing and complete disengagement without gear grinding during shifts.
What causes grinding when shifting a Syncro Range transmission?
Grinding typically results from improper clutch adjustment preventing complete disengagement, so gears continue spinning when attempting to shift. Worn synchronizer rings that no longer properly match gear speeds before engagement cause grinding in synchronized positions like first-to-third or second-to-fifth shifts.
Excessive wear in shift linkage creates sloppy movement preventing detents from properly positioning quadrants in correct gear locations, causing partial engagement or missing gears entirely. Worn shifter yokes, roll pins, bushings, and elongated quadrant grooves all contribute to imprecise shifting.
Attempting to shift non-synchronized ranges while moving always causes grinding, as these sections lack speed-matching mechanisms and require the tractor to be completely stopped before shifting.
How much does it cost to rebuild a 4020 Power Shift transmission?
Professional Power Shift transmission rebuilds typically range from $8,000 to $15,000 depending on extent of damage, parts availability, and labor rates in your area. Major components like clutch packs, planetary gears, valve bodies, and bearings can be expensive, with some individual clutch pack assemblies costing $800-1,500 each.
Complete factory-rebuilt exchange transmissions may cost $10,000-12,000 but eliminate downtime and include warranty coverage. Some owners report costs exceeding $20,000 for severely damaged transmissions requiring extensive machining and hard-to-find parts. The complexity of Power Shift systems makes this a job best left to experienced transmission specialists rather than general repair shops, as improper assembly causes immediate failure and wasted money.
What transmission fluid does the Power Shift require?
Power Shift transmissions require John Deere Hy-Gard J20C transmission and hydraulic oil, which contains crucial friction modifiers and anti-chatter additives essential for proper clutch pack operation. Using incorrect fluid causes clutch slippage, harsh shifting, and premature wear of friction materials.
The system holds approximately 12 gallons including the hydraulic reservoir, transmission case, oil cooler circuit, and filter housing. Change intervals should be every 1,200 hours or annually, whichever comes first, along with replacing both the transmission filter and suction screen.
Never use straight motor oil, universal tractor fluid lacking J20C specifications, or cheap hydraulic oil, as these lack proper friction characteristics and will damage clutch packs rapidly.
Why won't my Power Shift engage properly?
Engagement problems usually stem from worn roll pins on valve shafts that prevent proper spool valve positioning, binding or misadjusted shift linkage under the dash, or low transmission fluid pressure due to clogged filters or worn transmission pump. Failed or misaligned park brake cables can also prevent proper valve movement.
Internal clutch pack problems including worn friction discs, damaged seals causing pressure loss, or contaminated fluid reducing friction coefficient prevent proper engagement even with correct valve positioning. Check linkage adjustment and roll pin condition first before suspecting expensive internal failures.
Installing a hydraulic pressure gauge at the test ports quickly identifies whether problems are mechanical linkage issues or internal hydraulic failures requiring transmission disassembly for repair.
How do I adjust the park brake on a John Deere 4020?
Access the park brake adjustment through the inspection cover on the right side of the transmission case near the seat. Locate the adjustment nut on the brake band rod and tighten it by turning clockwise while periodically testing brake holding capability on an incline.
Proper adjustment allows the brake lever to engage with moderate effort while securely holding the tractor on slopes without slipping. Syncro Range tractors have superior park brake systems with mechanical locking compared to Power Shift models that rely solely on hydraulic pressure.
On Power Shift tractors, park brake effectiveness depends on maintaining proper transmission pressure, so weak brakes may indicate hydraulic issues rather than adjustment problems. Never depend solely on park brake when parking on steep inclines; always place in gear and chock wheels for additional safety.
3-Point Hitch & Implements
Addresses 3-point hitch capacity, adjustments, drift issues, draft control, and compatibility with modern and vintage implements used on the 4020.
What is the lifting capacity of the 4020's 3-point hitch?
The 4020 features a Category II 3-point hitch with approximately 3,500 pounds lifting capacity at the hitch points. This capacity handles most medium-duty implements including five-bottom plows, large discs, heavy rotary cutters, and standard balers effectively. Actual lifting capacity varies based on measurement point distance from the hitch pivot and whether the tractor has ballast weight.
Some sources report higher capacities with proper weight distribution. The hydraulic system provides sufficient power for typical row-crop operations, though heavier European-style implements may exceed the hitch's designed capacity and require auxiliary lift cylinders for safe operation.
How do I adjust the 3-point hitch draft control?
The draft control adjusting stud is located inside the transmission case near the rockshaft control valve assembly. Access it through the inspection cover or by partially lifting the rockshaft housing. Turn the adjusting stud clockwise to increase draft sensing sensitivity or counterclockwise to decrease it.
Proper adjustment allows the draft control to sense implement load and automatically raise the hitch when resistance increases in heavy ground. Test adjustment by engaging draft mode and observing hitch response under varying soil conditions. Incorrect adjustment causes either oversensitive response with constant hunting or insensitive operation where the hitch won't react to load changes.
What category is the John Deere 4020 3-point hitch?
The 4020 uses a Category II (Cat 2) 3-point hitch system, identified by 1-1/8 inch diameter lower link pins. This category accommodates medium to heavy-duty implements suitable for tractors in the 70-100 horsepower range. The top link and lower links feature Category II dimensions for proper implement compatibility.
Category II hitches provide stronger, larger pins and components compared to Category I systems found on smaller tractors. When purchasing implements or quick hitches, always specify Category II compatibility. Some implements offer adjustable bushings to work with both Category I and II hitches, but dedicated Category II equipment provides the best fit and strength.
Why does my 3-point hitch drop slowly when shut off?
Slow hitch drop after shutdown indicates worn rockshaft cylinder O-rings allowing internal leakage past the piston. When the engine stops, hydraulic pressure drops and gravity slowly pulls oil past worn seals. This problem worsens progressively as seal wear increases.
The lockout valve test confirms this: raise the hitch fully, close the lockout valve under the seat, then shut off the engine. If the hitch drops, the rockshaft cylinder seals need replacement. If it stays up, the problem lies in the control valve. Cylinder O-ring replacement requires splitting the tractor but solves drift issues completely.
Can I add a quick hitch to my John Deere 4020?
Yes, Category II quick hitches install easily on the 4020's 3-point hitch. Quick hitches dramatically reduce implement hookup time by eliminating the need to align lower link pins individually. Choose heavy-duty models rated for the tractor's lifting capacity. Popular brands include Pat's Quick Hitch, Speeco, and various agricultural manufacturers.
Installation requires removing existing check chains and attaching the quick hitch frame to the lower lift arms using the standard pins. Ensure proper adjustment so implements sit level when attached. Quick hitches add approximately 3-4 inches of height between the tractor and implement, which may affect ground clearance on some applications.
What causes the 3-point hitch to drift down while working?
Drift during operation typically results from a faulty check valve in the rockshaft control system or worn seals allowing internal leakage. The system should hold pressure when the control lever is set in position mode, but worn valve components permit oil to bypass back to the sump. Load sensing shaft seal wear can also cause pressure loss and drift.
Contaminated hydraulic fluid with metal particles accelerates valve seat wear, making drift progressively worse. Rebuilding or replacing the rockshaft control valve assembly addresses most drift problems. Temporary fixes include frequently adjusting the lift lever upward during work, but proper repair requires addressing the root cause.
How do I troubleshoot a leaking rockshaft cylinder?
Rockshaft cylinder leaks typically occur at the piston rod seal visible at the top of the housing. External leakage indicates damaged rod seal or scored cylinder walls allowing oil past the piston. Internal leakage causes hitch drift but shows no external signs. To diagnose, raise the hitch fully and observe for oil seepage around the piston rod.
Check cylinder walls for rust, scoring, or pitting when disassembled. Measure piston diameter and cylinder bore for excessive wear exceeding specifications. Complete seal kits include all O-rings and backup rings. Severe cylinder wall damage requires cylinder replacement or professional reconditioning with honing and oversized pistons.
What size implements can a 4020 handle effectively?
The 4020 effectively handles 5-bottom (16-18 inch) plows, 12-14 foot tandem discs, 7-8 foot rotary cutters, 8-10 foot field cultivators, and most standard square balers. For planting, it operates 6-8 row planters efficiently. The tractor's 91 PTO horsepower handles large round balers, forage harvesters, and heavy-duty post hole diggers.
Chisel plows with 9-11 shanks work well depending on soil conditions. Front-end loaders rated for this tractor class include 2,000-2,500 pound lift capacity models. Implement sizing depends on field conditions, with heavier clay soils requiring lighter implements than loose sandy soils.
Why is my 3-point hitch lifting unevenly?
Uneven lifting typically results from mismatched lift arm length adjustments or bent/damaged components. Check that both lower lift arms are adjusted to equal length by measuring from the center of the pin holes to the tractor. Inspect leveling links (stabilizer bars) for proper adjustment allowing equal movement on both sides.
Worn lift arm bushings or rockshaft support bearings create uneven leverage causing one side to lift differently. Damaged or bent lift arms, rockshaft, or mounting brackets also cause uneven operation. Verify hydraulic pressure reaches both lift cylinders equally by checking for damaged lines or restricted flow to one side.
Common Problems & Troubleshooting
Covers frequent mechanical and operational issues such as overheating, power loss, smoke, oil problems, steering difficulties, and effective diagnostic approaches.
What causes white smoke from the exhaust on a 4020?
White smoke indicates unburned fuel or coolant entering the combustion chamber. Cold starts often produce harmless condensation steam. Persistent white smoke suggests faulty injectors, low compression, or incorrect injection timing.
The most serious cause is coolant leakage from a cracked cylinder head, failed head gasket, or a porous engine block. Perform a compression test and check for coolant loss to diagnose internal leaks before major damage occurs.
Why is my 4020 losing power under load?
Common reasons are fuel starvation from a clogged filter, restricted tank vent, or weak lift pump. Check air intake for a dirty filter or restriction. Verify injection pump timing and governor operation.
Mechanical issues include low compression from worn rings/valves, a slipping clutch, or a failing torque amplifier. Also inspect for a partially engaged TA or a dragging brake causing parasitic load, mimicking power loss.
What causes excessive oil consumption in a 4020?
The leading cause is worn piston rings and cylinder liners allowing oil to pass into the combustion chamber, indicated by blue exhaust smoke. Worn valve guides and seals let oil enter through the intake ports.
External leaks from rear main seals, pan gaskets, or valve covers also contribute. Perform a cylinder leak-down test to confirm internal wear versus external leaks before deciding on an engine overhaul.
Why does my 4020 have low oil pressure?
This often signals bearing wear (main/rod/camshaft) creating excessive clearance, preventing pressure buildup. A faulty or stuck pressure relief valve, worn oil pump, or diluted/thinned oil are other culprits.
First, verify gauge accuracy with a mechanical tester. Check for correct oil viscosity and filter type. Persistent low pressure at operating temperature usually necessitates an engine teardown to inspect bearings and oil galleries.
What causes the steering to be hard on a John Deere 4020?
Low hydraulic fluid level or air in the system are the first checks. A worn or failing steering pump cannot generate sufficient pressure. Internal leaks in the steering valve or cylinders also reduce assist.
Mechanical binding from damaged thrust bearings in the pedestal, a seized kingpin, or dry upper/lower bushings creates physical resistance. Isolate the issue by checking if steering effort changes with engine RPM.
Why is there water in my hydraulic oil?
Condensation is the most common source, especially with frequent temperature cycles and a partially filled reservoir. Check for a missing or damaged breather cap on the transmission/hydraulic housing allowing moisture ingress.
External leaks include a cracked transmission case or faulty seals letting rainwater or wash water enter. Coolant intrusion from a leaking oil cooler is a serious but less frequent cause, requiring immediate repair.
What causes the clutch to slip on a 4020?
A worn clutch disc facing is the primary cause. An improperly adjusted free-play (too much pedal play) prevents full engagement. Oil or grease contamination from leaking rear main or transmission input shaft seals drastically reduces friction.
A weak or broken pressure spring, warped pressure plate, or a glazed flywheel surface also contribute. Slipping manifests as high RPM without proportional speed increase, especially under load, generating a distinct burnt smell.
Why does my 4020 diesel knock or rattle?
Incorrect injection timing (too advanced) is a frequent cause, creating a sharp metallic knock. Faulty, worn, or stuck injectors with poor spray patterns cause misfiring and rattling. Low-quality fuel with low cetane rating also promotes knocking.
Mechanical knocks include worn main/rod bearings, piston slap from excessive liner clearance, or loose valve train components. Isolate the source by checking if the noise changes with individual cylinder fuel cut-off.
What causes fuel in the crankcase oil?
A leaking diaphragm in the mechanical lift pump is the classic culprit on the 4020, allowing fuel to drain directly into the crankcase. Check for overfull oil level and a strong diesel smell.
On diesel models, faulty injectors or injection pump seals can leak fuel into the cylinder, which washes past the rings into the oil. This condition dilutes oil, severely reducing lubrication and risking catastrophic engine failure.
Buying Guide – What to Look For
Provides practical inspection tips, pricing guidance, desirable serial numbers, red flags, and advice to help buyers evaluate used John Deere 4020 tractors. Also, check our complete John 4020 buyers guide.
What is a fair price for a John Deere 4020 in good condition?
Prices vary significantly based on model year, condition, and options. A fully functional diesel row-crop model in good mechanical shape typically ranges from $8,000 to $15,000 USD. Rare models or those with excellent original restoration command higher prices.
Values are driven by serial number, presence of a factory cab, and whether the T/A and hydraulic systems work perfectly. Non-running or heavily worn tractors sell for significantly less, often as parts donors.
What are the most expensive repairs to watch out for on a 4020?
A complete engine overhaul involving new sleeves, pistons, and crankshaft work is the costliest. Rebuilding the Torque Amplifier (T/A) and the associated range transmission requires specialized labor and expensive parts.
Major hydraulic system repairs, like replacing the rockshaft housing or pump drive gears, are also significant. Extensive rear end damage or a cracked transmission case can approach or exceed the tractor's market value.
Are high-hour 4020s still worth buying?
Yes, if the tractor has been properly maintained. These engines are known for longevity; 8,000+ hours is common. The critical factor is not total hours but maintenance history and how it was used.
Prioritize mechanical condition over cosmetic appearance. A high-hour tractor with documented overhauls (engine, T/A) is often a better investment than a lower-hour tractor with neglected major systems.
What serial number ranges are most wanted for the 4020?
Later serial numbers (generally above 200,000) are most sought-after. These incorporate more factory improvements, like the larger 404 cubic inch diesel engine and updated hydraulic system.
The "Sound Gard" cab models (serial ~201,000+) are desirable for operator comfort but check for cab rust. Early "3010-style" dash models have their own collector appeal but may lack later features.
Should I buy a diesel, gas, or LP version of the 4020?
The diesel is overwhelmingly the preferred choice for fuel efficiency, torque, and long-term value. Gas models are simpler but far less fuel-efficient and have lower resale value. LP (Liquid Propane) models are rare collector items but impractical for daily use due to fuel availability.
For any serious work, the diesel version is the only practical option. Ensure the diesel's injection pump and injectors are in good condition, as they are expensive to repair.
What are red flags when inspecting a used 4020?
Major red flags include metallic debris in hydraulic fluid, non-functional Torque Amplifier, or significant blow-by (smoke from crankcase breather). Water in the oil or hydraulic fluid indicates serious sealing issues.
Extensive rear end gear noise, inability to hold hydraulic pressure, and major structural welds or cracks in the frame or axle housings are severe warnings. Walk away if the seller won't allow a cold start or load test.
Is a side console 4020 worth more than a standard dash model?
Yes, the side console ("Power Shift" console) models command a premium. This configuration, introduced later, is more user-friendly and often indicates other factory upgrades. It's highly sought-after by collectors and users.
However, condition remains paramount. A well-restored standard dash model is worth more than a neglected side console tractor. The premium for the console itself is typically 15-25% on comparable tractors.
How can I verify the authenticity of a 4020's hours?
Examine the 5-digit hour meter for consistency; a very low number on an aged tractor is suspicious. Cross-reference wear patterns: pedal rubbers, shift knob, seat condition, and lever paint should align with claimed hours.
Check for signs of meter replacement or tampering. The most reliable verification is a professional mechanical inspection assessing internal engine and drivetrain wear, which tells the true story regardless of the meter.
What paperwork should come with a used John Deere 4020?
Ideally, you want a clear title or notarized bill of sale to prove ownership. Maintenance and repair records are invaluable, especially for major work like engine or transmission overhauls.
Original operator's and technical manuals add value. If applicable, documentation for any aftermarket additions or non-factory components is helpful. A written warranty, even if short-term, provides significant buyer protection.
Maintenance & Service
Outlines service intervals, fluid types, filters, lubrication points, storage tips, and routine maintenance practices to keep a 4020 reliable and long-lasting.
What type and weight of engine oil should I use in a 4020?
For the diesel engine, use a high-quality diesel-rated oil like SAE 15W-40 (API CK-4 or CJ-4) for most climates, providing optimal protection for the sleeve-type engine. In very cold conditions, a 10W-30 can aid cold starts.
Gasoline models should use a detergent oil like SAE 30 (API SJ or newer). Always prioritize oil meeting John Deere's Torq-Gard Supreme specification (JD 303 equivalent is obsolete). Never use multi-grade oil labeled for gasoline engines only in a diesel.
How often should I change the hydraulic filters on a 4020?
Change the primary hydraulic filter (canister type) every 300 operating hours or annually, whichever comes first. The secondary suction screen should be cleaned meticulously during this same interval. Contaminated fluid demands immediate replacement of both filters.
Severe operating conditions like constant loader use or dusty environments—require more frequent 150-200 hour changes. Always use genuine John Deere or high-quality equivalent filters; cheap alternatives often lack proper bypass valves, risking pump damage.
What is the proper way to grease a John Deere 4020?
Thoroughly clean each grease fitting with a rag before attaching the grease gun nozzle to prevent injecting dirt. Use a lithium-based, high-pressure multipurpose grease. Pump grease slowly until clean grease purges from the seal or joint, indicating old contaminants are expelled.
Pay special attention to the front axle pivot, steering knuckles, and brake pedal shafts. After greasing, wipe away all excess to prevent attracting dust. Always grease the tractor when the components are warm for better penetration and distribution.
How many grease fittings does a 4020 have?
A standard 4020 row-crop model has approximately 25 to 35 grease fittings, depending on configuration and accessories. Key locations include the front axle (kingpins, pivot), brake and clutch pedal shafts, PTO lever, seat pivot, and all three-point hitch linkage points.
Tractors with loaders add several more fittings on the loader arms and pivot pins. Create a checklist to ensure none are missed during routine maintenance. Missing or broken fittings must be replaced immediately to prevent premature wear of expensive components.
When should I change the transmission fluid in my 4020?
Change the transmission, differential, and final drive fluid every 1,000 hours or every two years under normal use. For tractors operating in severe conditions, such as constant heavy loading, dusty environments, or with detected moisture contamination—reduce this interval to 500 hours.
Use only fluid meeting John Deere's JDM J20D specification (modern equivalent to JD 303). Drain the fluid when warm to suspend contaminants. Inspect the drain plug for excessive metal particles, which can indicate internal wear needing further investigation.
What fuel filters does the 4020 diesel use?
The diesel 4020 uses two primary fuel filters: a sediment bowl with a replaceable screen or element on the fuel pump inlet, and a main in-line canister filter. The exact filter numbers (like AR50172 or equivalent) depend on the specific injection system and year.
Always use filters with a 10-micron rating or finer to protect the expensive injection pump and injectors. Change both filters every 200-300 hours, and never run the tractor on a single filter if it was designed for a dual-filter system.
How do I properly store a John Deere 4020 for winter?
Begin by adding a fuel stabilizer to a full fuel tank and running the engine to circulate treated fuel through the system. Change the engine oil and filter to remove acidic contaminants. Remove the battery, clean it, and store it fully charged in a cool, dry place.
Block the tractor up to take weight off the tires. Engage the parking brake and place blocks at the wheels. Cover the exhaust and air intake to prevent rodent entry. If storing outdoors, use a breathable cover to minimize moisture condensation on metal surfaces.
What is the correct coolant mixture for a 4020?
Use a 50/50 mixture of ethylene-glycol antifreeze and distilled or deionized water. This provides freeze protection down to -34°F (-37°C) and raises the boiling point, while the inhibitors protect against cavitation erosion of the wet cylinder liners.
Never use plain water or cheap antifreeze lacking supplemental coolant additives (SCAs). Test the coolant concentration annually with a refractometer. Replace the coolant every two to three years, as the corrosion inhibitors degrade over time, risking liner pitting and scale buildup.
How often should valve adjustments be performed?
Adjust valve clearance on the 4020 diesel every 1,000 operating hours or during a major tune-up. This interval is critical for maintaining proper compression, fuel economy, and preventing burnt valves. Gasoline engines require more frequent checks, around every 500 hours.
Always adjust valves when the engine is stone cold. Use the specifications in the technical manual (typically 0.015" for intake and 0.020" for exhaust on diesel). Irregular engine noise or loss of power are clear signs an adjustment may be needed sooner.
Parts Availability & Restoration
Explores parts availability, OEM versus aftermarket options, restoration costs, manuals, decals, and upgrades commonly considered when restoring a John Deere 4020.
What are the best sources for 4020 replacement parts?
Start with your local John Deere dealership for critical OEM components like gasket sets, hydraulic valves, and bearings. For aftermarket and specialized restoration parts, trusted suppliers include Steiner Tractor, All States Ag Parts, and Yesterday's Tractor Company.
Online auctions and tractor salvage yards are invaluable for finding good used parts, especially for sheet metal and hard-to-find original components. Always verify part numbers and condition, especially when purchasing used mechanical assemblies.
Should I use OEM or aftermarket parts for my 4020?
For critical internal components like engine bearings, hydraulic pump gears, and crankshafts, genuine OEM or high-quality branded parts (like Clevite or A&I) are strongly recommended. Their precise specifications ensure longevity and proper function in the high-stress systems.
For cosmetic parts, sheet metal, seals, and many non-critical components, quality aftermarket reproductions are often a cost-effective and perfectly suitable choice. Always research brand reputation and avoid the absolute cheapest options for mission-critical parts.
How much does a complete 4020 restoration cost?
A full professional restoration can cost between $15,000 and $30,000+, exceeding the value of most finished tractors. This includes a complete engine and transmission overhaul, new tires, sandblasting and painting, new wiring, and refurbishing all systems.
A meticulous owner-performing labor can reduce costs to $8,000-$15,000 for parts and materials. The final cost depends entirely on the tractor's starting condition, how many major components need rebuilding, and the desired level of show-quality finish versus functional refurbishment.
Can I still get new sheet metal for a John Deere 4020?
Yes, high-quality reproduction sheet metal is widely available for nearly every panel, including hoods, side panels, grilles, and fenders. Sources like Steiner Tractor and Tractor Stuff specialize in these parts, offering them in various stages from raw stampings to pre-painted.
Original Deere "Heritage" sheet metal is sometimes available but commands a premium. Fit and finish of reproductions can vary; be prepared for minor fitting adjustments. For a perfect restoration, many opt for professional bodywork on original panels if they are salvageable.
What are the most commonly needed replacement parts for a 4020?
Frequent wear items include seat cushions and upholstery, wiring harnesses, brake linings, PTO shafts, and gauge clusters. Hydraulic system components like O-ring kits, pump drive couplers, and control valves are also in high demand due to constant use.
Engine parts like sleeve and piston kits, head gaskets, and water pumps are common. For the drivetrain, Torque Amplifier (T/A) clutch packs and input shaft seals are frequently replaced due to the complexity and age of the system.
Are reproduction decals available for the 4020?
Yes, accurate, high-quality reproduction decal kits are readily available from suppliers like Maple-Hunter Decals and Tractor Decals. These kits include every sticker, from the model number on the hood to the caution labels and instruction plates, specific to the tractor's year and model.
Using the correct decal set for your serial number is crucial for authenticity. Quality vinyls with proper adhesive are designed for longevity. Proper surface preparation and application technique are key to a professional, lasting result.
Where can I find a service manual for my John Deere 4020?
The essential Technical Manual (TM-1111 for later models) is available as original paper copies, high-quality reprints from Jensales or I&T, or digital versions from John Deere's official website. Operator's and parts manuals are also widely reproduced.
Online forums and enthusiast sites often have downloadable resources. Investing in the genuine technical manual is highly recommended for any serious repair work, as it contains critical specifications, torques, and procedures not found in generic guides.
What upgrades are worth doing during a 4020 restoration?
Modern 12-volt alternator conversion is a highly recommended reliability upgrade. Adding an in-line fuel filter/water separator protects the injection system. Upgrading to a spin-on hydraulic filter adapter simplifies maintenance. Consider radial tires for improved traction and ride.
Internal upgrades can include installing an updated piston design for better oil control or a high-capacity water pump. Avoid non-reversible modifications that destroy originality if preserving collector value is a priority. Focus on upgrades that improve reliability and usability.
Can I still get new seats and upholstery for a 4020?
Absolutely. Complete replacement seats, both the traditional pan seat and the later suspension seat, are available as assemblies or as upholstery kits from numerous tractor seat suppliers. Companies like A&B Seats and Tractor Seats specialize in accurate reproductions.
Kits include new foam, vinyl covers, and often replacement hardware. For a perfect fit, specify your exact tractor model and seat type. Reupholstering the original seat frame is a straightforward weekend project that dramatically improves the operator's experience.
Last Words
The John Deere 4020 remains a benchmark in agricultural machinery, valued for its durability, versatility, and long-term reliability. Whether you are an owner, restorer, or prospective buyer, understanding its systems and common issues is essential.
This FAQ guide is intended to help you make informed decisions, maintain your tractor properly, and get the most out of one of John Deere’s most legendary models.
Final Note
These John Deere 4020 FAQs are provided for general informational purposes only and should not be considered official technical or legal guidance. Specifications, procedures, and recommendations may vary by model year and configuration.
For official, up-to-date, and authoritative information, always consult John Deere’s official website, service manuals, or contact an authorized John Deere dealer or service center directly.